
BLENDER: BLENDER-OVERGROWTH-WIN.ZIP
This guide assumes you are familiar with the 3D reference guide.
Basics
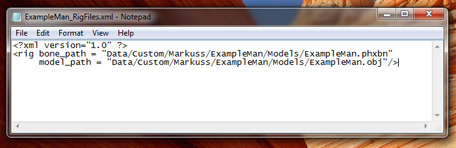
Characters in overgrowth consist of 4 .XML files, an .OBJ file and a .PHXBN file.
The .PHXBN file is created in bender and contains the Skeleton and skin weighting info.
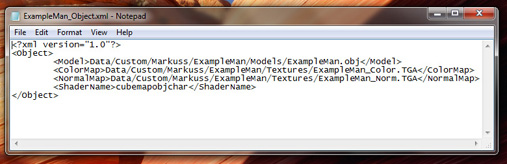
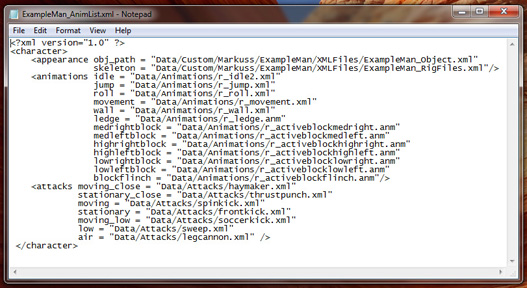
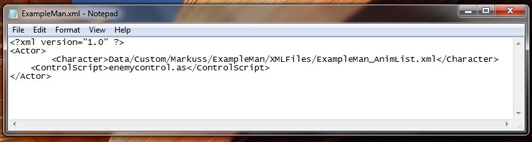
The XML files just contain links to themselves and other files:
1 - Links to the .OBJ and .PHXBN files that the engine needs to rig the character.
2 - A regular object file as described in the 3D reference guide.
3 - Links to the first 2 files, and a load of animation files for each action.
4 - Links to the third file and an AI script, this is the file you choose when loading a character.
____________________________________________________________________________________
Model and Texture Requirements
Models have to be triangles only and centered to the middle of the scene with location, rotation and scale set to zero. It should loosely match the pose and proportions of the overgrowth characters, you can use this: rabbit.obj
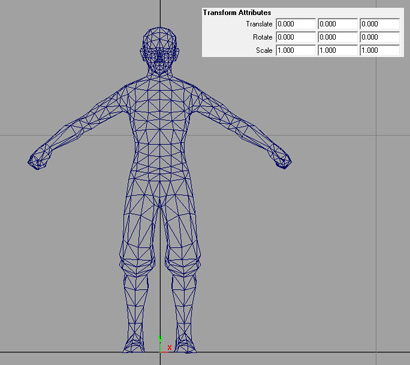
Character Model Faces Z-axis
The normal map has to be object-space, there is currently no character shader that supports tangent-space. The normal map's alpha channel controls a side-glow effect when the sun is behind the character, black = no effect.If your character is not symmetrical, ignore the center line in the geometry, it has to be the ‘true’ the center of the model, otherwise you will get errors
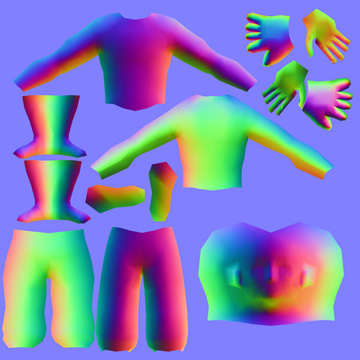
This is what a Blank/Flat object-space normal map looks like.
Color Space:
Blue = light from top
Red = light from right
Green = light from front
____________________________________________________________________________________It is possible to use a blank (blue) normal map with the Cubemap shader, the character is rendered brighter, but it is acceptable, most community characters are like this
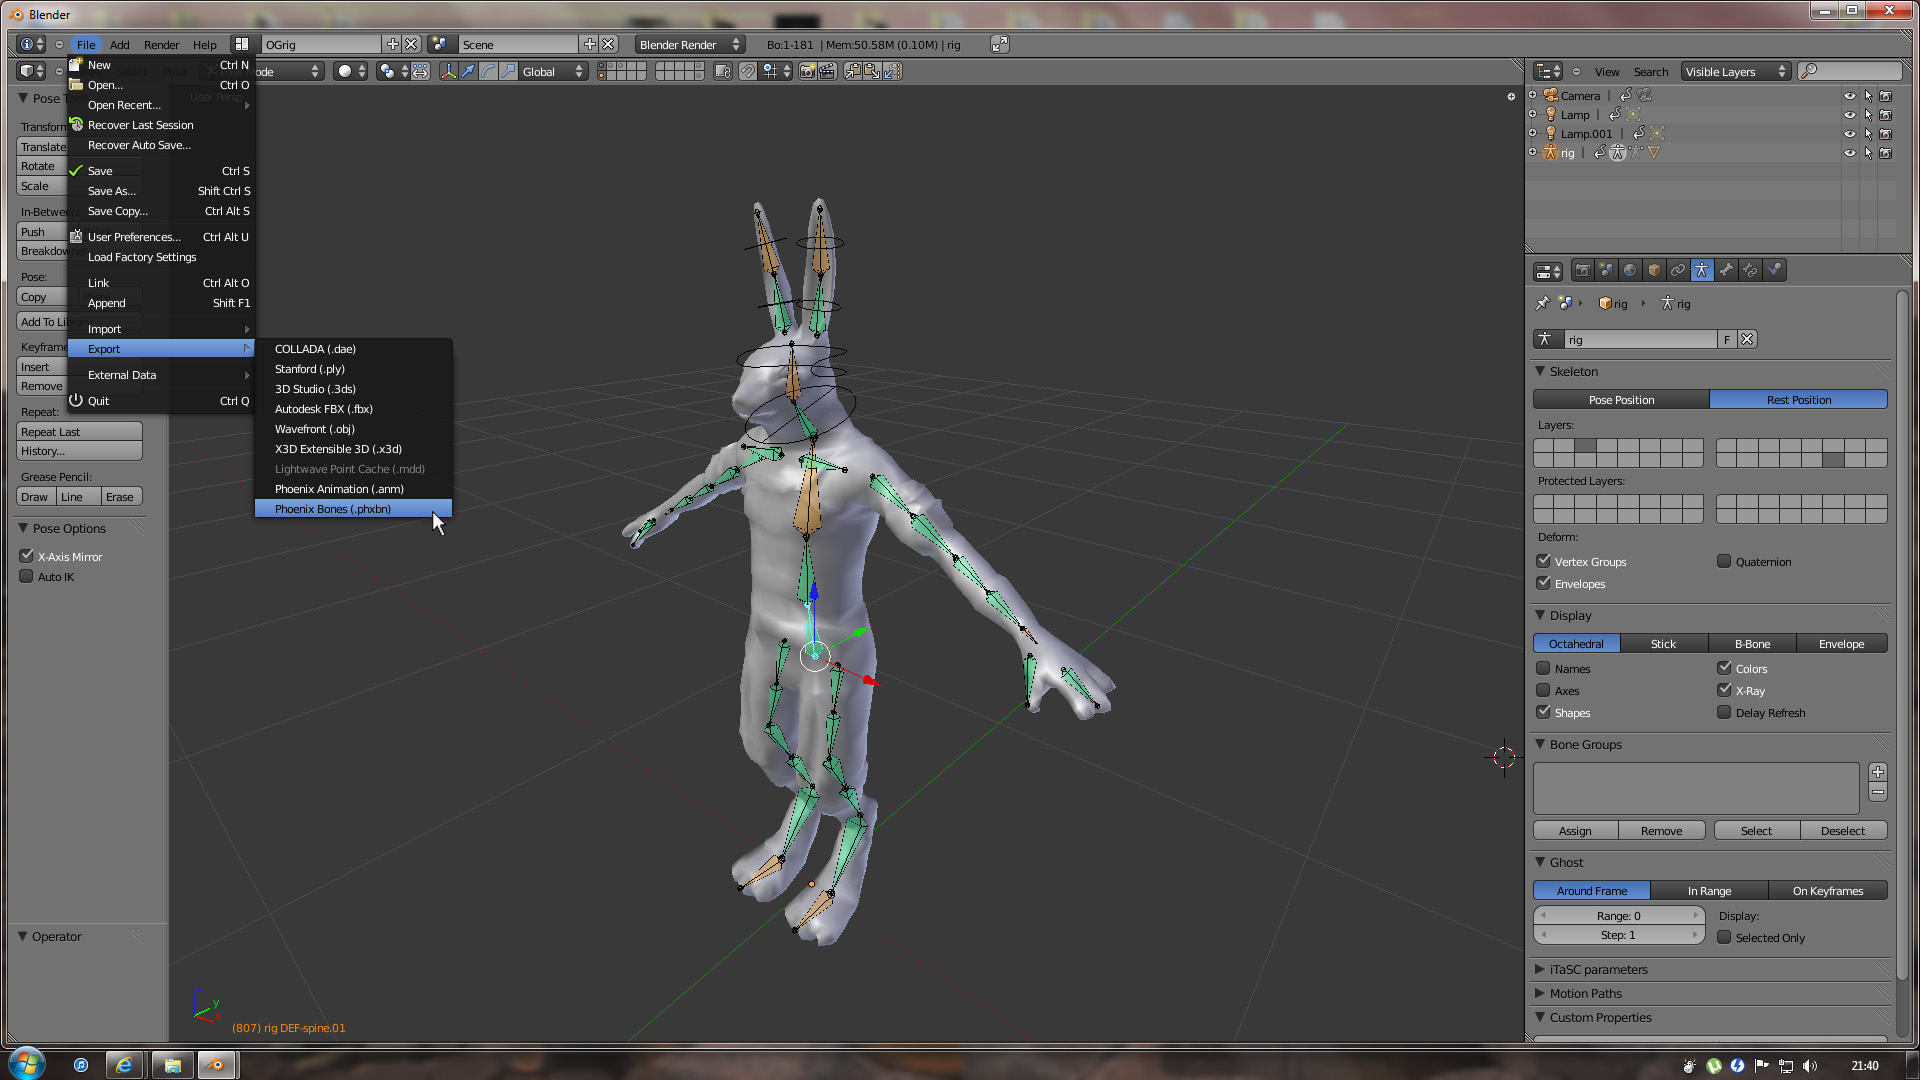
Blender
I have repackaged it with the export add-ons and customised the UI for making characters, it does not require an install and can be run from its folder. You may need to restart it once to get the export options to show up.
I’m not going to write a full tutorial on using blender, just list the steps and tell you the keyboard shortcuts u need:
camera:
Scroll = zoom
Middle mouse = rotate
Shift + Middle mouse = pan
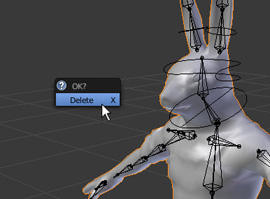
Step 1: Replace the white rabbit
right-click = select
del = delete
You can import your mesh as an .OBJ
Step 2: Bind your own mesh to the skeleton
shift + right-click = select more then 1 object
Ctrl+P = bind selected mesh to selected skeleton (armature deform)
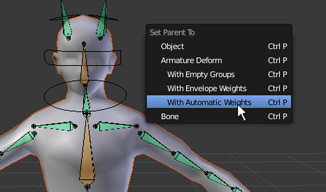
u need to select the mesh, then the skeleton, before u press Ctrl+P
Step 3: Paint weights
Drop down box near file menu = switches between editing modes
TAB = switches between last 2 editing modes

you may want to go to YouTube and look up a tutorial on painting weights in blender…
Step 4: Export your files
With skeleton selected in object mode, export as .PHXBN, same for mesh but as .OBJ, needs to be in rest position.
You should test your character in engine with automatic weights, just to check that you have no errors before you paint, it won’t look pretty, but it’s just a test
____________________________________________________________________________________


